This page may contain affiliate links that allow us to make a small commission from qualifying purchases (at no extra cost to yourself). We appreciate your support.
Are you wondering how to take your terrarium to the next level? One great way to do this is to turn your regular ol’ terrarium into a bioactive terrarium, also known as a vivarium! What’s that, you ask? Here’s a simple explanation:
A bioactive terrarium, also called a vivarium, is an enclosed habitat for raising animals or plants for observation and often research. The self-sustaining ecosystem for a particular species is simulated on a smaller scale and environmental conditions are controlled to mimic that species’ natural ecosystem.
More information about bioactive terrariums and things you need to keep in mind when creating one is below.
Throughout this article, I have included links to any materials or items needed (typically through Amazon or Etsy) for your convenience. Although I do receive a small commission through these affiliate links (at no cost to yourself), I have only included items that I would highly recommend and have had a positive experience with.
What Makes a Bioactive Terrarium Different?
Before getting started, it’s important to understand some of the major differences between a terrarium and a bioactive terrarium. A terrarium is like an aquarium, but for plants instead of fish. Plants are placed in a glass container to look like a tiny garden or enclosed miniature forest.
A bioactive terrarium is a container that can house both live plants and organisms that’s purpose is to take the waste of animal species living in the terrarium to essentially “self-clean” the habitat.
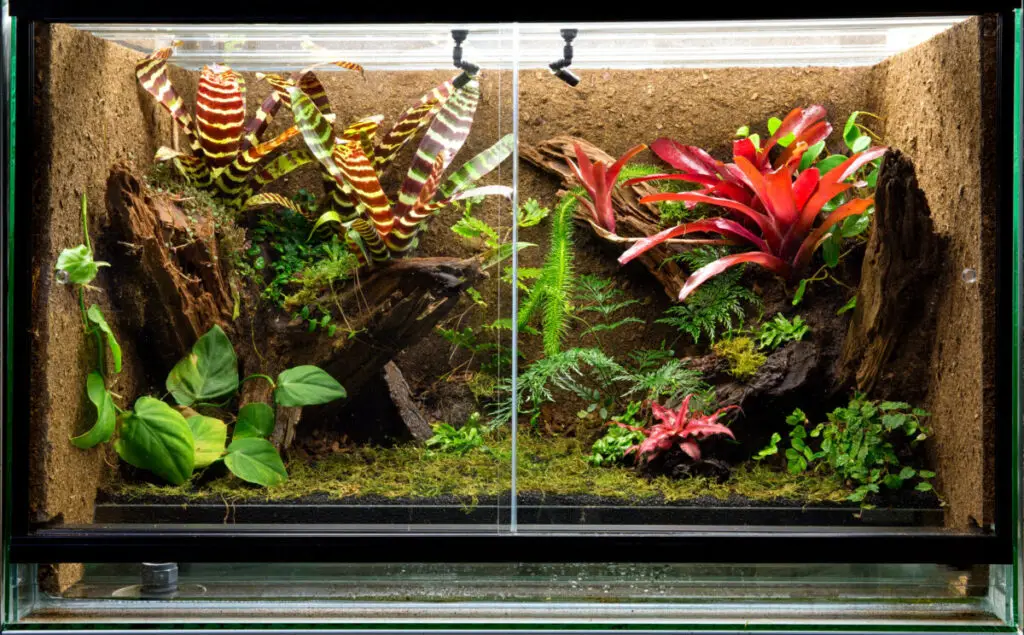
Building Your Own Bioactive Terrarium
What You Will Need:
Finding materials for your bioactive terrarium is incredibly easy these days. You can find materials at most pet stores, or home improvement stores. Online stores like Etsy and Amazon are another great option with a massive selection of materials to choose from. See the below highlighted links for my personal recommendations.
Here is everything you will need to consider to start your own bioactive terrarium setup:
Container – First, you will need an enclosed container. Glass is typically preferred, but an Acrylic container may also be suitable for a nano-terrarium. The size of this container will largely depend on what you are wanting to house within your bioactive terrarium.
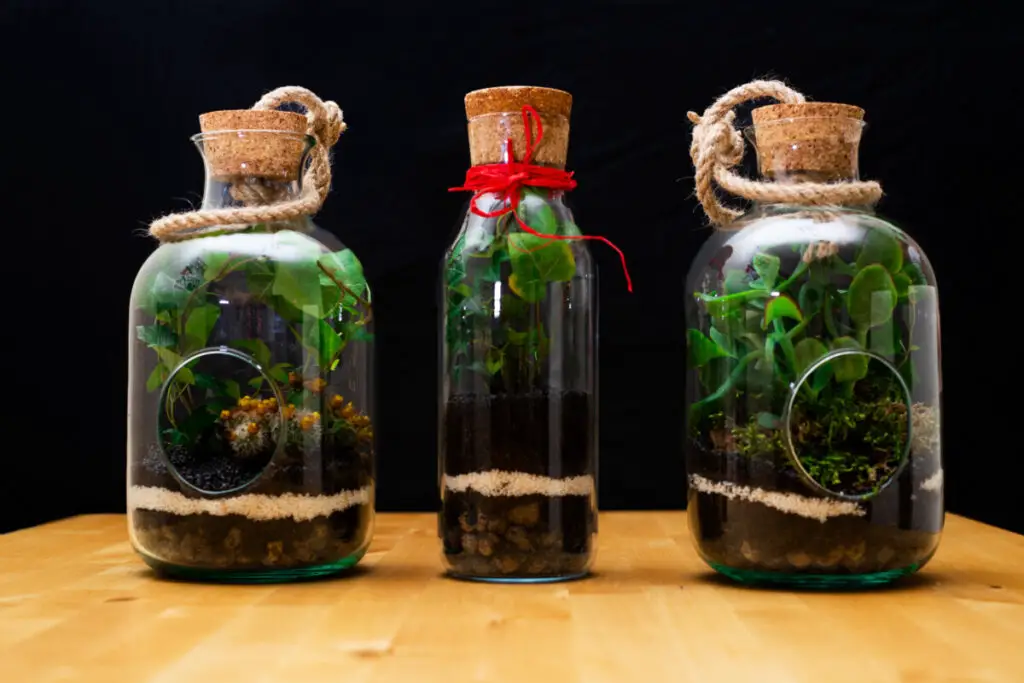
If your looking for a nano-terrarium container to house live plants and/or small bugs and invertebrates, then you could get away with something quite small such as this nano-terrarium enclosure on Amazon or small jars similar to those pictured above..
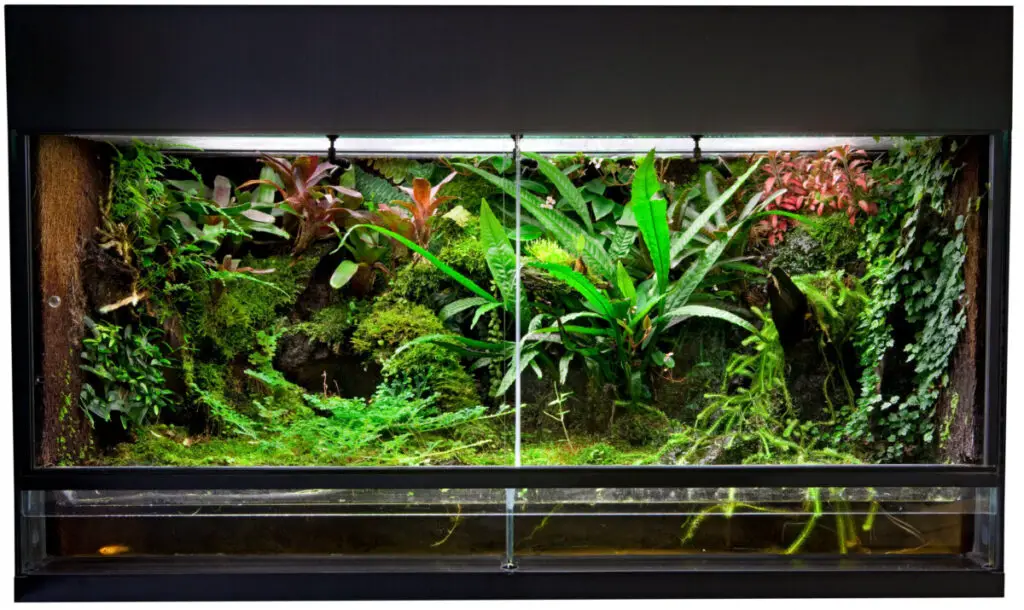
For larger bioactive terrariums, such as enclosures needed to house larger reptiles, the space required will largely depend on your animals needs. See this article I have written for specific enclosure requirements for a wide variety of reptiles and vivarium animals. This 67 gallon, large reptile terrarium enclosure from Amazon has worked well for me in the past with no issues.
After choosing the container in which you are going to build your terrarium, you can focus on the materials and other elements that will go inside.
Drainage – In this step, you will be creating a base layer to become the foundation of your terrarium to help absorb moisture that enters the terrarium. The most common materials used for this are gravel or sand, but you could also use moss if you would prefer.
Activated charcoal – To help collect any potentially harmful chemicals that may enter the terrarium, charcoal can be placed at the bottom of the container. Having a specified area for the collection of bacteria can help your microfauna thrive better than if you just relied on natural collection to occur. If your curious as to why terrariums need charcoal, then take a look at this article.
Substrate – The substrate’s purpose is to make your terrarium more comfortable and welcoming for any bacteria that will grow there. Just as you would furnish a house with furniture to have space to live and thrive, a hearty substrate will do the same to create an inviting area for bacteria to grow. Usually, a substrate is created with materials like bark and moss. See below for 4 great substrate mix recipes you can make at home!
Microfauna – Choosing which microfauna to put in your terrarium has to be done with intention. The microfauna you choose to occupy your terrarium will determine how the overall habitat reacts and either thrives or dies.
Fungi – Fungi are very similar in their purpose to microfauna, so it is alright if you choose between the two and don’t have both in your terrarium. It tends to be a personal preference of the owner as to which one they choose.
Natural Decoration:
Part of the fun of building your own bioactive terrarium is creating your own design. Lucky for you there are a wide variety or materials available that can help provide you with the terrarium environment that you desire.
Wood – Certain types of wood are naturally more resistant to rot, like Mopani for example. Over a while, wood will break down and can become an additional source of nutrition for your microfauna. You can find terrarium wood on Amazon. Some types of wood you can find on your own outside; like driftwood or bark pieces. Just make sure the wood hasn’t been treated with any pesticides, and dry it completely before adding it to the terrarium. If you can’t find your own, you can purchase driftwood pieces online or at many pet supply stores.
Rocks – If you would like your terrarium to have a more mountain-like look, you might consider using lava rock as your natural decoration. Lava rock is very porous so it can also help with water retention. Lava rock is usually best added after adding your substrate layer and before adding your plants.
Leaf Litter – There are all sorts of different bioactive feeds available for your bugs, but a more natural solution is to sprinkle your terrarium with a small layer of leaf litter. This will serve as a great starter source for your bugs’ nutrition. You can take leaves from outside, but if you do so, be sure to microwave them first so that any dangerous bacteria are removed before placing them in the enclosure. If you would rather ere on the side of caution, then you can buy leaf litter straight from Amazon. Below is more information about the different types of leaf litter, if you are wanting to gather some yourself.
Partially Composted Leaves – These contribute to the starting population of natural, beneficial bacteria and fungi that create a biologically active mix. This mix will break down and eliminate waste, resulting in a healthy environment. It is also an important source of organic material and nutrients for plants.
Partially composted leaves consist of the dead leaf litter in varying states of decomposition found at the base of trees. This includes the newly-fallen leaves at the surface to the older, finer matter several inches down. The best kinds of leaves for this are small, relatively tough types such as scrub oak, alder, elm, birch, aspen, poplar, and more.
Avoid using leaves that are too large, like magnolia, or delicate ones that turn mushy too quickly, such as maple. Do not collect leaf litter from areas that may have been exposed to insecticide or herbicide. To eliminate any possible unwanted bugs and most weed seeds, spread leaves out on a tarp or blanket in a dry area for a few days. This way the bugs will leave, dry up, or get eaten by birds.
Fully Composted Leaves – These are the older, finer leaves described above, so the freshly fallen leaves and large pieces are taken out. These leaves are a very fine, dark, and crumbly material that is found in the lower layers of leaf litter.
Bioactive Terrarium Bugs
Now that you have the design, layout, and environment all setup, its time to add some wildlife! The best place to start would be bugs. Bugs are great to start with as they help to kick start your mini ecosystem before trying to introduce a larger animal species.
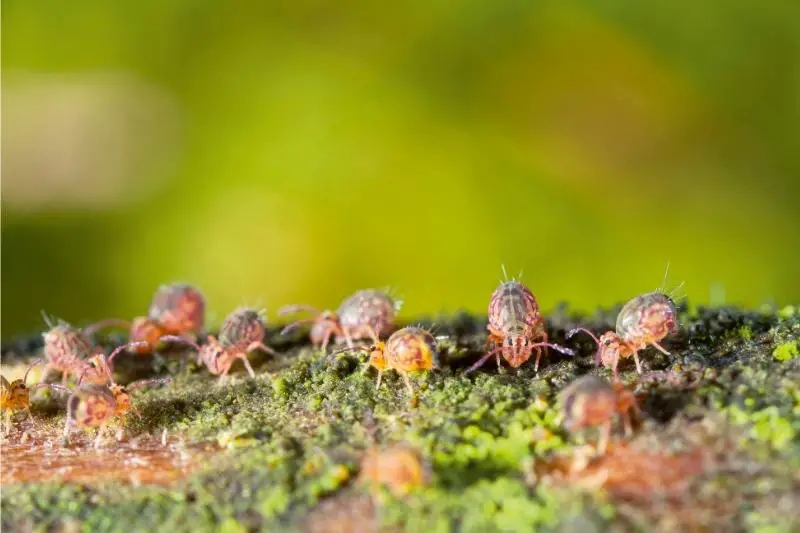
Springtails – These bugs are one of the most popular options when considering which type to place in your terrarium. Springtails are detritivores that are known for their ability to consume and remove mold and are small enough to be an appropriate option for almost any terrarium. They’re also cheap and easy to get, and infrequent feeding is enough to keep a colony sustained. Though usually white or tan, they do come in a range of colors.
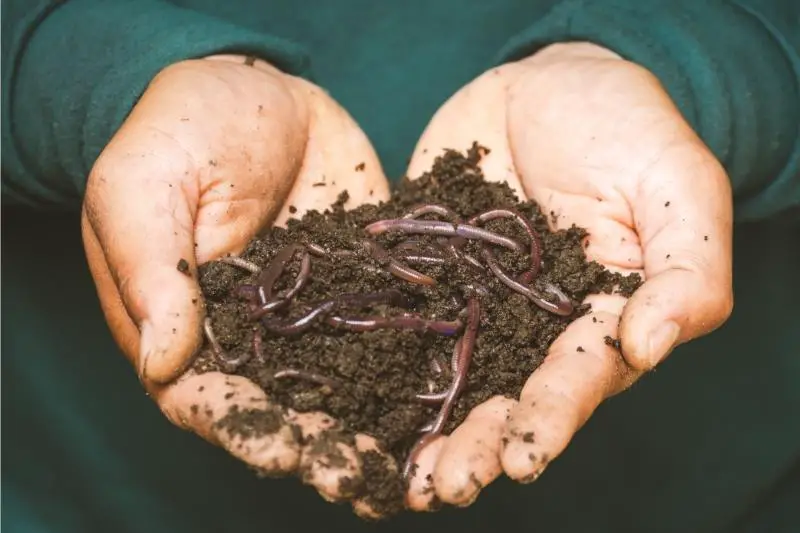
Worms – Worms are not always an appropriate option due to their size, but in a medium-to-large scale terrarium, worms perform not only the typical duties of breaking down organic matter but also aerate the soil by creating tunnels. This is incredibly beneficial over time and prevents the soil from becoming too compact. Earthworms and mealworms are common options that are readily available online.
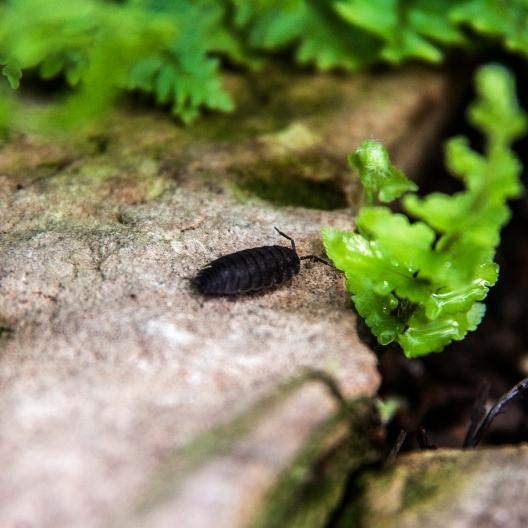
Isopods/Pill Bugs – Isopods, also known as pill bugs, come in many colors and sizes. If you are wanting to have smaller bugs roam your ecosystem, there are types of dwarf isopods available that are equally efficient eaters of organic waste.
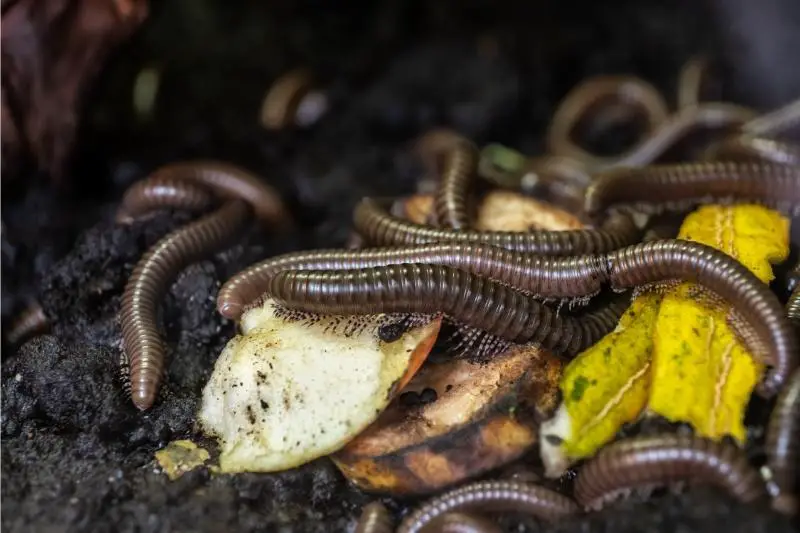
Millipedes/Centipedes – Millipedes are also great consumers of organic waste, and are another great option for keeping your terrarium bioactive. Much like worms, these critters can help to aerate your substrate. Centipedes are less commonly used in terrarium enclosures. However, as predators, they can fulfill the role of population control of other bugs if necessary, which can be nice since isopods and springtails breed readily.
Homemade Substrate Mix Recipes
After gathering all the necessary materials, it is possible to make your own substrate mix. Every natural vivarium must have a substrate designed for the specific type of environment, which meets the needs of the animals or plants that will live in the vivarium. These substrates simulate the kinds of soils found in the animals’/plants’ natural environments and allow them to be healthy.
Complete, prepackaged natural substrates are not available on the market for purchase, however, it is very easy and inexpensive to make a natural vivarium substrate yourself. To do this, you can use the substrate materials found in most reptile/pet shops, home improvement stores, nurseries, and plant stores.
There are three basic kinds of natural vivarium substrate mixes, which are forest, desert, and bog. Below is a recipe for each type of substrate mix. Each mix can be further altered to meet the specific needs of certain animals and plants.
Basic Forest Vivarium Substrate Mix
- 2 parts partially composted leaves
- 2 parts medium-grade bark/wood chip product
- 1 part ground coconut husk fiber (coir)
- Organic, complete general-purpose plant fertilizer, including trace minerals – use only half the amount of fertilizer per volume of mix recommended on the package.
Chunky Forest Vivarium Substrate Mix
(This substrate may be in a vivarium where plants that require excellent drainage are planted.)
- 1 part basic forest vivarium planting mix (from above)
- 2 extra parts bark/wood chips
Basic Desert Vivarium Substrate Mix
- 2 parts natural sand
- 1 part ground coconut husk fiber
- ½ part fully composted leaves
- Organic, complete general-purpose plant fertilizer, including trace minerals – use only one-third the amount of fertilizer per volume of mix recommended on the package.
- Sulfur – 1 teaspoon per gallon of finished substrate mix
Basic Bog Vivarium Substrate Mix
- 2 parts natural sand. For this mix only, the sand should be washed several times to remove the dust.
- 1 part ground coconut husk fiber
- ¼ to ½ part fully composted leaves
- Quality commercial pond plant fertilizer formulated for use in fish ponds – use only one-quarter the amount per volume of mix recommended on the package.
- Inoculation of bottom medium (about a handful of sand or mud) from a healthy, established aquarium or pond, to introduce beneficial bacteria.
How to Clean a Bioactive Terrarium?
Being a low-maintenance hobby is often the selling point for terrarium enthusiasts. When done correctly, bioactive terrariums will require very little cleaning and maintenance. In terrariums with high humidity and light exposure, you can expect algae to build up on your glassware over time.
Algae aren’t necessarily detrimental to your ecosphere, and you might enjoy the look of algae on the terrarium enclosure because it shows their age. This look is not for everyone, however, and it may not be the desired aesthetic you are wanting for your terrarium. To take care of this, you can use a little bit of paper towel on the end of some tweezers to gently wipe the algae away.
How much does a Bioactive Terrarium Cost?
Building a terrarium can cost you anywhere from $10 to $2,000. This wide range in pricing is due to the fact that there are many different types of terrariums and vivariums, so costs often differ. Terrariums can also sell for anywhere between $20 and $120. One of the reasons why the price differs so much is because of skill and how well the creator can tailor their designs to the demands of a niche market.
So, instead of spending a ton of money on expensive materials, it can be equally or more valuable to instead focus on building unique terrarium designs.
Based on information gathered from an online forum, many vivarium and terrarium builders agreed that after adding the total cost of maintaining a terrarium, the price range appears to be around $10 to $2,000. The high price range is usually for people who will heavily invest in their terrarium, but don’t let that deter you from this unique hobby.
Generally, the average cost for most terrarium owners is usually less than $100. Using an old or used container and gathering some of the natural materials yourself will help cut costs. If you know or find other people who enjoy the same hobby, you could even trade plants or extra supplies with them.
If you buy everything new, the price of all of the necessary materials and supplies could come to about $300-$400. Keep in mind that as you continue to build terrariums, vivariums, and acquire more supplies, they will cost less to make because you will already have some of the supplies left over from other projects. Thus, the price drops significantly as you get more supplies, and the cost will end up being closer to $50-$100 each, not including that tank or container.
Give it a Try!
Now that you have a much stronger understanding of what makes up a bioactive terrarium, you should be able to start brainstorming what you would like for your very own. Before you know it, you will have your very own, self-sustaining ecosystem, right there in your living room!

Meet Brad, the creator behind Vivarium Vibes, where his deep connection with nature and animals truly comes to life.