This page may contain affiliate links that allow us to make a small commission from qualifying purchases (at no extra cost to yourself). We appreciate your support.
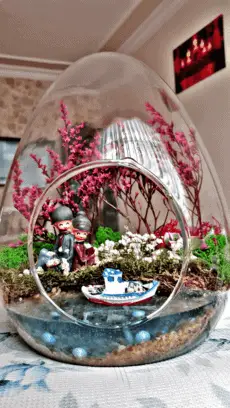
Recently, I have been interested in creating a more dynamic terrarium that incorporates my love of water. I wanted to find a practical solution using fake water or some type of water alternative. I decided to do some research and see what options I could find.
Fake water for a terrarium can be made using epoxy resin, Realistic Water products, glue, or candle gel wax. Other water alternatives can include blue agate slices or colored pebbles, stones, gems, or crystals.
By using fake water or artificial alternatives, I found that I could incorporate water elements, like a waterfall or pond, that could become a permanent part of my terrarium scene. See below for a step-by-step guide for each of my top fake water suggestions. I have also included some bonus guides on how to create water effects using everyday household items and how to create a waterfall terrarium.
If you happen to be curious if terrariums are able to hold real water, then check out my article to understand the limitations of adding real water to terrariums.
Method 1: Epoxy Resin
Epoxy Resin is a very common method used for imitating water in terrariums and miniature scenery models. It is best used for creating rivers, ponds, oceans, and lakes.
Things You’ll Need
- Epoxy Resin & Resin Hardener
- Craft Mixing Stick
- Plastic measuring cup x 2
- Colored Resin Dye
- Craft Glue and materials for preparing and sealing surface base
Step 1 – Prepare Your Surface
Decide where in your terrarium you want your water feature to go. Make sure to create a base for the water made from a hard surface, like glass, wood, or plastic, that is sealed from the other areas of your terrarium.
As a lot of terrariums have a base made from soil and gravel, be sure to seal off your water area so that the epoxy resin will not seep into other areas of your terrarium. You can then paint your surface to match your chosen scene if desired.
Step 2 – Mix Resin with Resin Hardener
As Epoxy Resin should be poured in layers, only 1/8 to ¼ inch of resin should be poured at a time.
Do not work in cold or high humid conditions as it will cloud your mixture. You typically have 30 minutes of working time from when you pour your resin to when the resin starts to gel.
Simply:
- Pour up to ¼ inch of resin, into a plastic container
- Pour an equal amount of resin hardener into a separate plastic container
- Combine both equal parts of resin and hardener together
It is extremely important that you have a 1:1 volume ratio and that both amounts are equal.
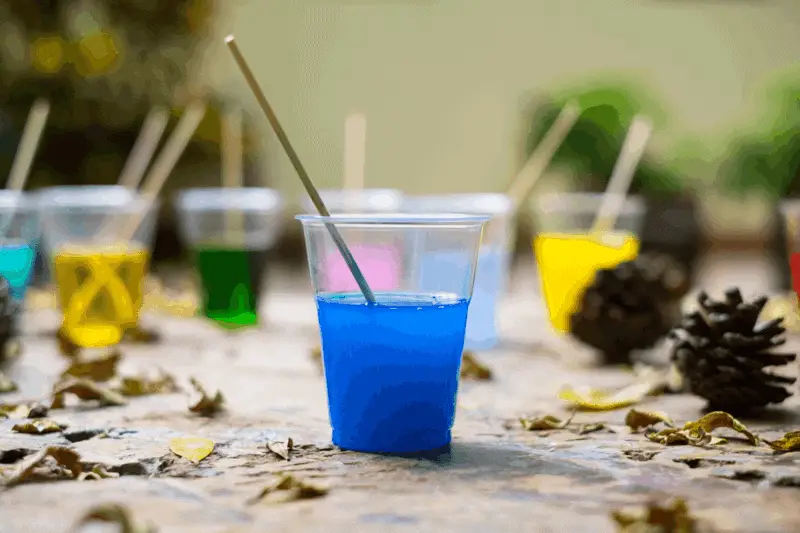
Step 3 – Color Your Resin Mixture
- Add your desired resin dye or colored enamel paint to your resin mixture
- Use a craft stick to slowly mix the resin and hardener together
- The more slowly you stir, the less bubbles will appear. To remove bubbles, gently exhale over the mixture.
- If color is not matching your desired shade, add more color and repeat stirring instructions.
Step 4 – Pour in Layers
Epoxy Resin will crack if poured in large quantities or if it has not fully cured before adding an additional layer. Only 1/8 to ¼ inch of resin mixture should be used at a time.
Pouring the mixture in layers will allow you to increase the thickness of the application without risking the integrity of the final product. Pouring in layers also allows you to create the illusion of deep water and other unique water effects.
Simply:
- Pour resin mixture into the terrarium surface you have prepared
- Allow up to 24 hours for the resin to fully cure and harden to avoid cracking
- Repeat steps 2 & 3 to create your second layer of resin mixture.
Be sure to use a lighter color pigment for subsequent layers for a more natural effect.
- Pour the second layer of resin mixture on top of the first layer
- Allow up to 24 hours for the resin to fully cure and harden
- If needed, repeat steps 2 & 3 to create a third layer of resin mixture.
- If applicable, allow up to 24 hours for the third resin layer to fully cure and harden
Method 2: Realistic Water Product
If your short on time and want a simpler method for creating fake water, try using a product called Realistic Water by Woodland Scenics.
There is no mixing required as it pours directly from the bottle.
Simply:
- Pour up to 1/8 inch of liquid, straight from the bottle, onto your surface base.
- If desired, add colored dye as the liquid will dry clear.
- Allow 24 hours for the product to dry
That’s all there is to it! You can add layers if desired, just wait until each layer has dried completely before adding an additional layer. A depth of 1/8 inch covers an area of 17 inches in diameter.
Method 3: Glue
For this method you can use either craft glue or wood glue. I would suggest using craft glue as it is more affordable and easily accessible. Craft glue dries clear, so you can be creative with the types of water features you build using colored dyes or acrylic paint.
Step 1 – Prepare Your Base
Decide where in your terrarium you want your water feature to go. Make sure to create a base for the water made from a hard surface, like glass, wood, or plastic, that is sealed from the other areas of your terrarium.
Paint the inside of the base to provide a more realistic effect. For clean water, use shades of blue, for swampy, pond water, use shades of brown, green, and black.
Step 2 – Create Glue Mixture
- In a small bowl, mix ¾ glue and ¼ water. Enough to have a thickness of ½ inch for your water base.
- If desired, add color using food coloring, dye, or acrylic paint
Step 3 – Pour in Layers
- Pour the glue mixture into the terrarium water base. Be sure not to exceed ½ inch in thickness.
- Allow the glue to dry for 72 hours
- Repeat step 2, and continue to add additional layers, making sure each layer is fully dry before adding to it.
Method 4: Candle Gel Wax
Using candle gel wax to make fake water is a great option if you are wanting to include items within your water, such as seashells, stones, or decorative sea life creatures.
Just follow these simple steps:
- Prepare your terrarium base by sectioning off where your water will be with masking tape, glue, or plastic
- Heat your desired amount of candle gel wax over low heat until melted into a liquid
- Add color by stirring in your chosen colored dye or acrylic paint
- Add any decorative items into your terrarium base
- Pour liquid into your allotted surface base
Method 5: Blue Agate Slices
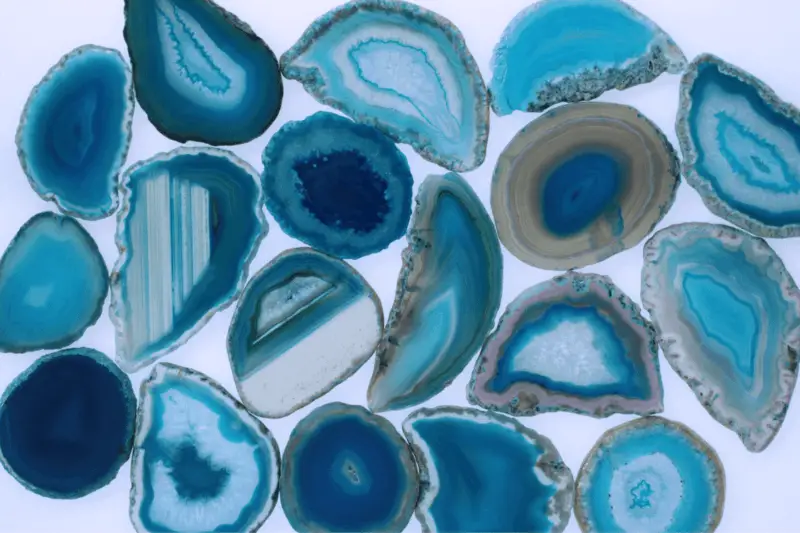
Agate is a common rock formation that comes in a variety of colors and is primarily formed within volcanic and metamorphic rocks.
By using these Blue Agate Slices, you can create the illusion of deep water or the ocean without the hassle of dealing with solidifying liquids.
- Simply place them within your terrarium and rearrange them anytime you wish!
Agate stones have been known to provide positive, strengthening, and stabilizing energy that helps to keep you energized and empowered. People have also been known to use them as protection from bad dreams.
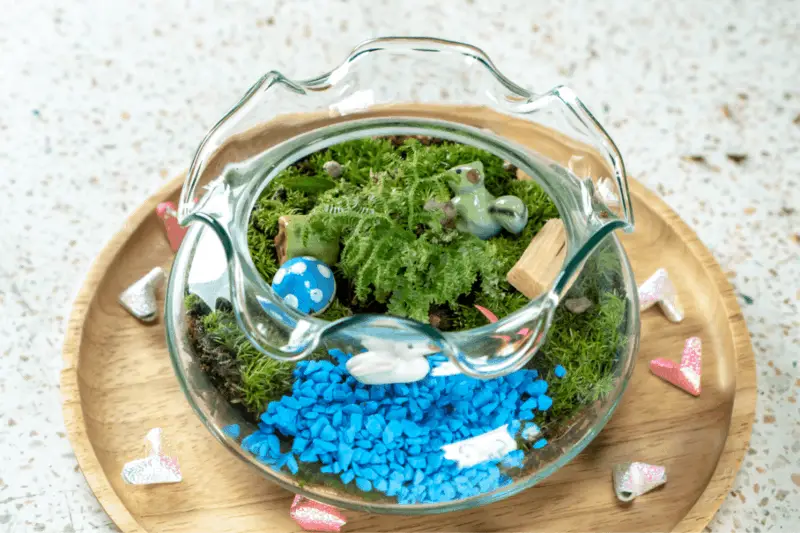
Method 6: Pebbles, Stones, Gems, or Crystals
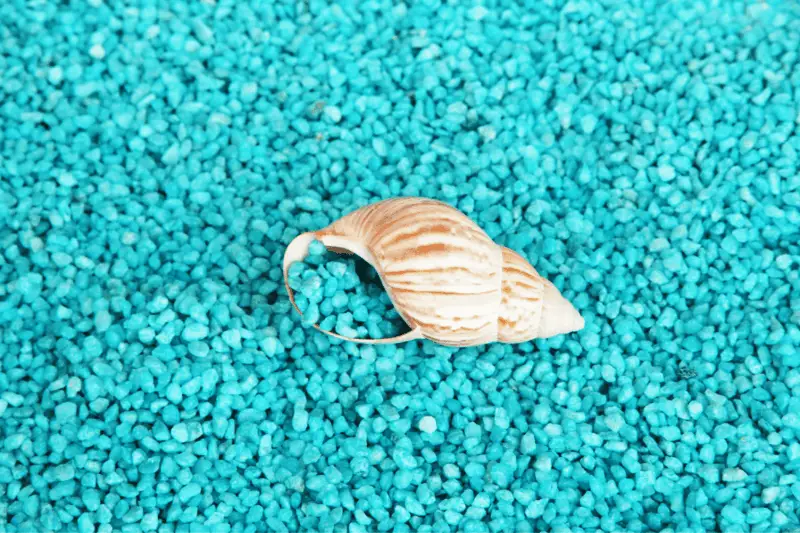
Another method that doesn’t involve any complicated liquids is using decorative colored pebbles, stones, gems, or crystals. By combining a handful of blue stones, you can easily create the appearance of water.
This is a great option for desert terrariums or terrariums with soil, where you need adequate drainage throughout the entirety of your terrarium.
These decorative stones are my top choice as they provide vivid blue colors that have a slight sparkle.
Bonus: How to Add Water Effects And Elements?
To take your water feature to the next level, you will want to incorporate some water effects like waves or ripples. This will really bring your water to life.
Ripples or Moving Water
To create ripples or small waves, use the bottom part of a paint brush, toothpick, or fork and slowly drag them back and forth through the gel or resin in short lengths. To create long ripples, simply increase the length you drag your utensil across the liquid.
If using resin, you need to wait until the liquid has started to slightly gel together, otherwise the ripples won’t hold their form.
Ocean Water
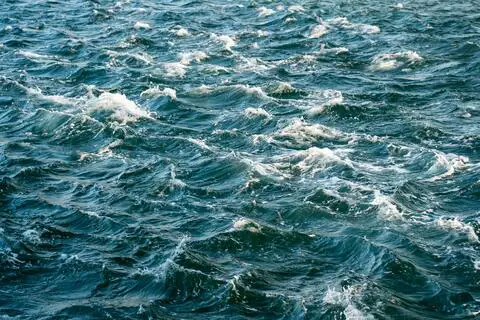
Another neat trick is to use toilet paper to create realistic ocean water or waves. This works well if you’re using the glue method but can also be used with other methods if you have some glue on hand.
Simply:
- Place a layer of toilet paper on top of your solidified water
- Brush glue mixture (see Method 3: Glue for instructions) onto toilet paper
- Allow a few hours to dry
- Place an additional layer of toilet paper
- Brush glue mixture onto toilet paper and allow to dry
- On top of dried second layer of toilet paper, add a layer of glue mixture
- Adding the glue mixture will soften the below toilet paper layer and allow you to mold the toilet paper to create ocean or river waves.
- Allow glue to dry for at least 24 hours
- Paint water to create desired water effect using acrylic paint
Below is a great video demonstrating how to create realistic ocean water using this technique.
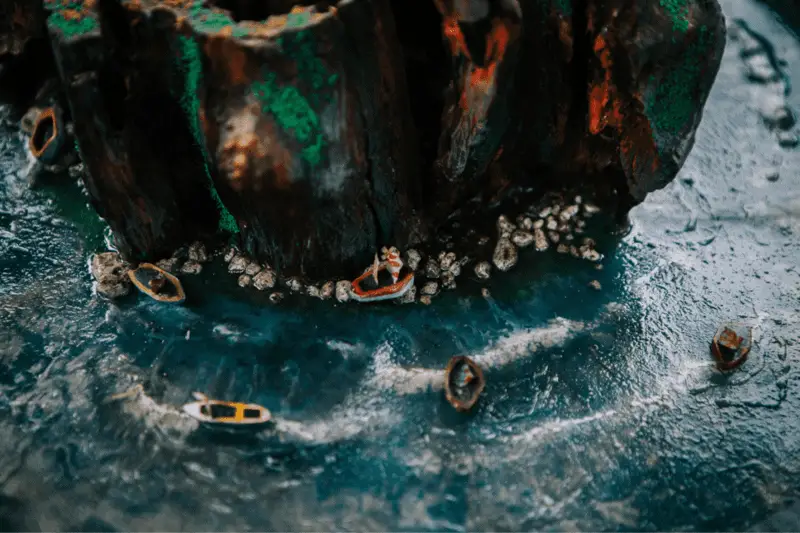
Objects in the Water
Placing objects within your water feature can provide the realistic appearance that helps to blend your water into the natural environment of your terrarium. The main thing to consider when adding objects to resin is your layers.
Plan your work carefully. You might need to seal an area before you pour your resin and add in details with each layer.
For instance, you will want to add decorative sea life in between layers of resin when building a realistic stream or pond.
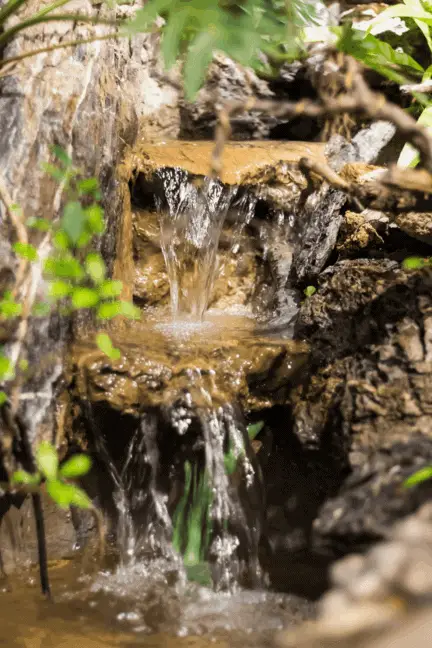
Bonus: How to Make A Fake Waterfall?
I love visiting waterfalls when I travel and so I couldn’t resist adding a fake waterfall to my terrarium. They are surprisingly simple to create but really add depth and life to your terrarium.
Things You Will Need
- 1” thick Styrofoam board or Rocks
- Sharp knife or box cutter
- Hot glue sticks/hot glue gun
- Acrylic paint & paint brush
- Clear plastic bottle that can be cut into strips
- Candle
- Epoxy Resin (Method 1)
- Glue mixture (Method 3)
Step 1: Prepare Your Waterfall Structure
For the base structure of your waterfall, you can either use rocks or get creative and carve a rock-like structure using Styrofoam. The benefits of using Styrofoam is that it doesn’t weigh anything!
If using rocks, stack them on top of each other to create the style of your structure. Once you have them where you want them, be sure to glue your rocks together to prevent them from moving out of shape or falling.
If using Styrofoam, carve rock-like formations and structure them how you desire. Try adding a basin to the bottom to catch the water from the waterfall, creating a pond. Or stack them in layers to create a cascading effect. Once you have your rock formations where you want them, glue them together.
Step 2: Paint the Rocks
If using actual rocks, your probably don’t need to bother with painting them unless you want certain colors. If using Styrofoam, you will want to paint your structure to resemble a rock formation.
Try looking up different images of waterfalls online to use as a reference. Mix up the color tones to have a more realistic look. You can add texture by dry brushing (brushing lightly with little paint) the lighter paint over the top of the darker paint.
Step 3: Create the Waterfall Foundation
The first step is to cut a thin sliver of plastic from your bottle. Th length and width of the plastic strip will depend on how wide and long you want your falling water to be. You can cut multiple strips for a lighter, cascading waterfall or one solid strip for a more powerful waterfall.
Once you have your plastic strips, you need to bend the top of the strips slightly so that they can attach onto your rock formation. The easiest way to do this is to hold them above a candle, briefly, to allow them to slightly melt. This will allow you to then bend them to the shape you want.
Step 4: Add the Fake Water and Pond
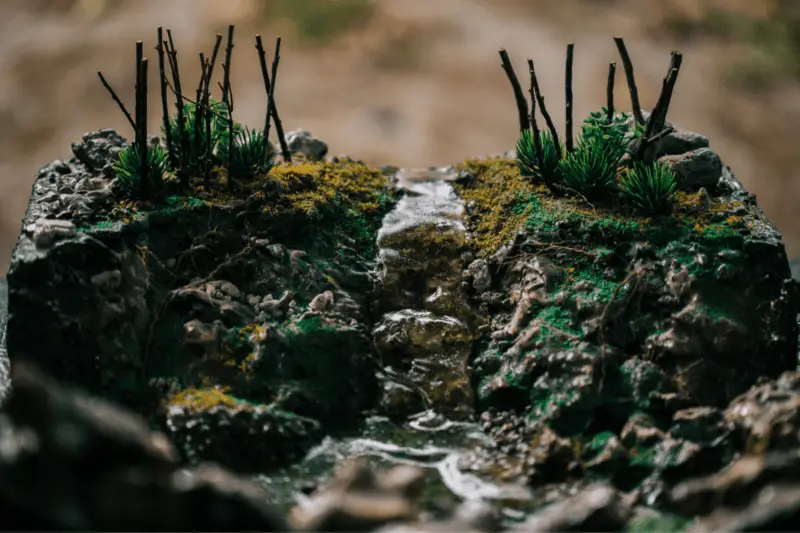
The glue mixture from method 3 discussed earlier, is best used for the falling water section of your waterfall. Drizzle the glue with a toothpick, along your plastic strips, and allow them time to dry. If your mixture is too liquid, place the strips horizontally and apply so that you can cover your strips appropriately.
Using Epoxy resin from method 1 above, is best used for the water in the basin/pond. Add some small stones or decorative fish into the pond before pouring the resin mixture to create a more realistic effect.
Final Thoughts
From my research I realized that there are many methods available for making fake water for your terrarium, some easier than others. I have tried to collate a variety of simple, affordable options that anyone can use within their own terrarium landscape.
Be sure to get creative by adding more details to your waterfall like moss, plants, or other decorative nature elements. I hope that this article was a good resource for you and that you will soon be able to share in my love of water by adding fake water to your own terrarium!

Meet Brad, the creator behind Vivarium Vibes, where his deep connection with nature and animals truly comes to life.